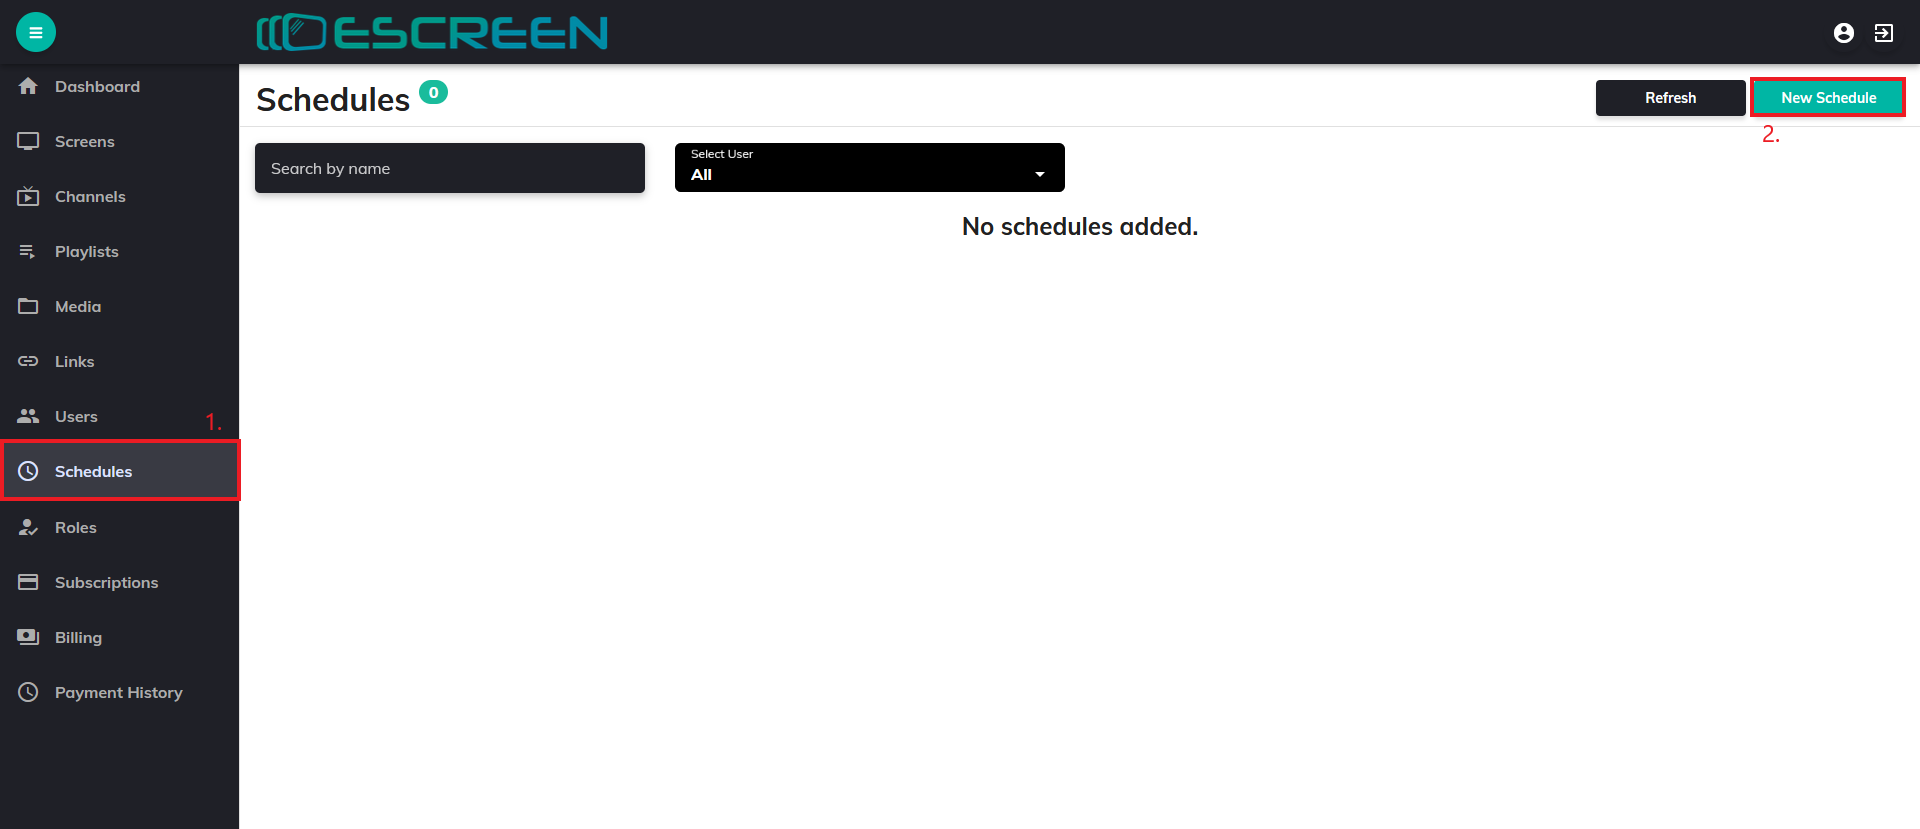
Step 1: Go to Schedules Tab
First click on Schedules tab
Then click on New Schedule on Top-right side.
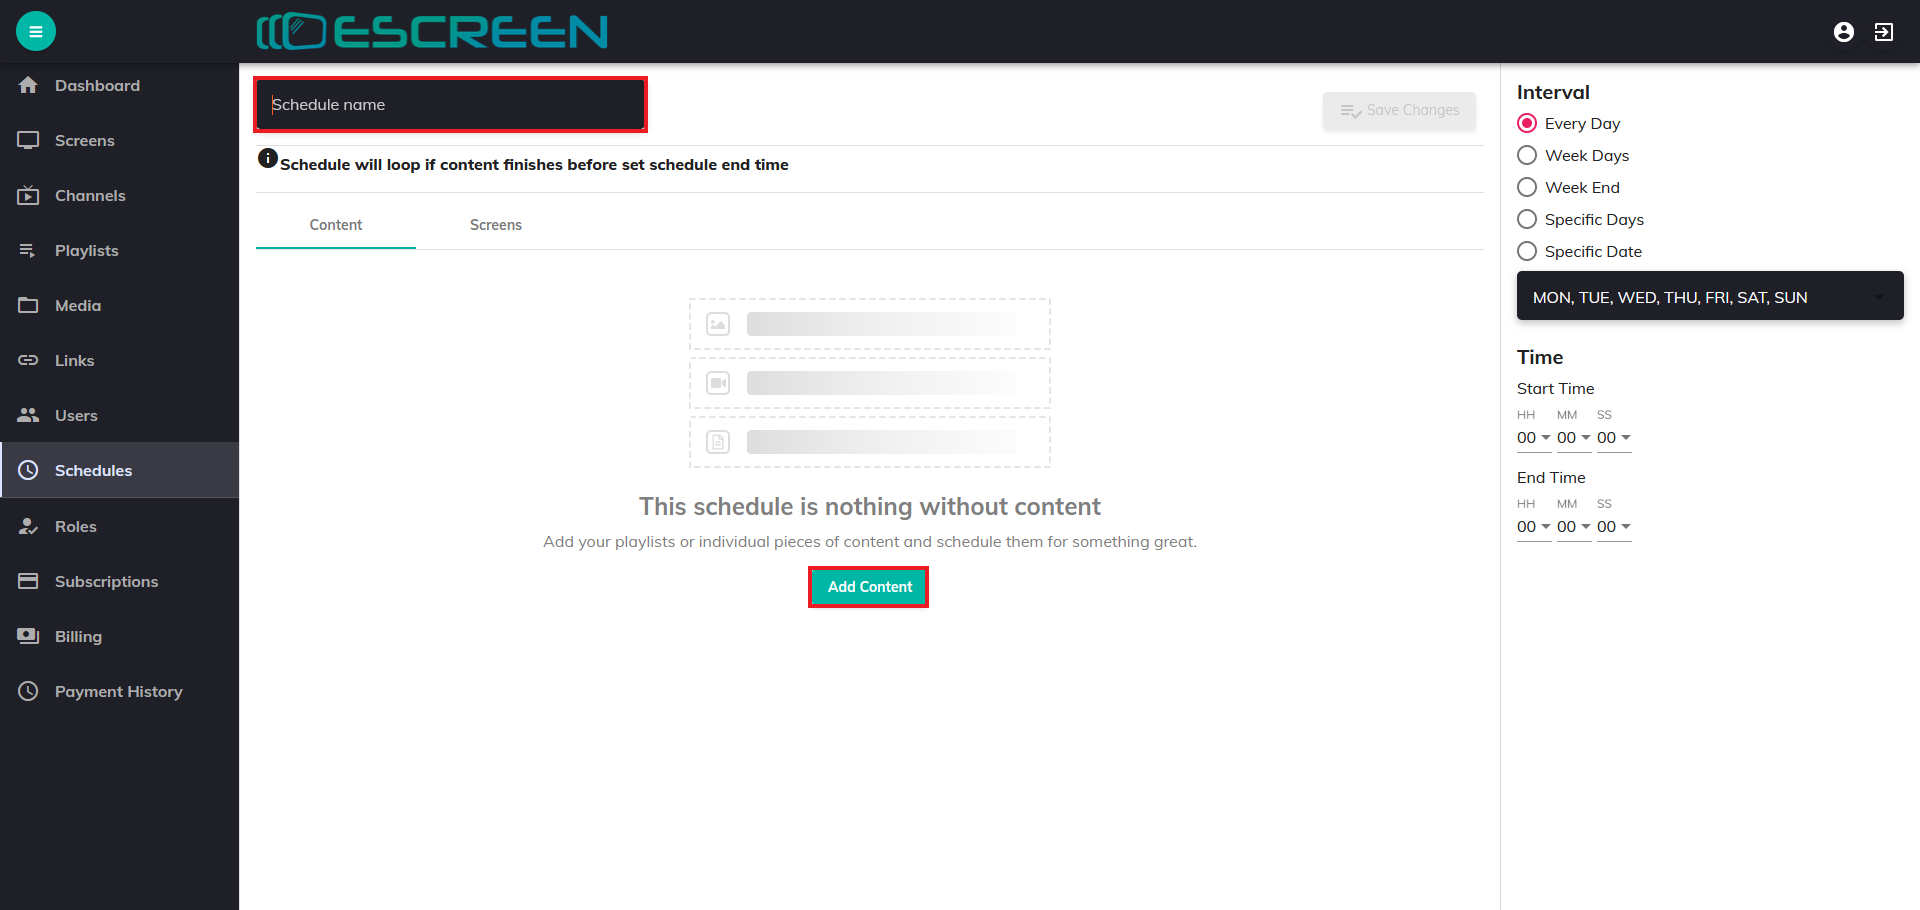
Step 2: Write Name and Add Content
After you click on New Schedule, you will be re-directed to Schedules page.
First write Schedule Name and then click on Add Content.
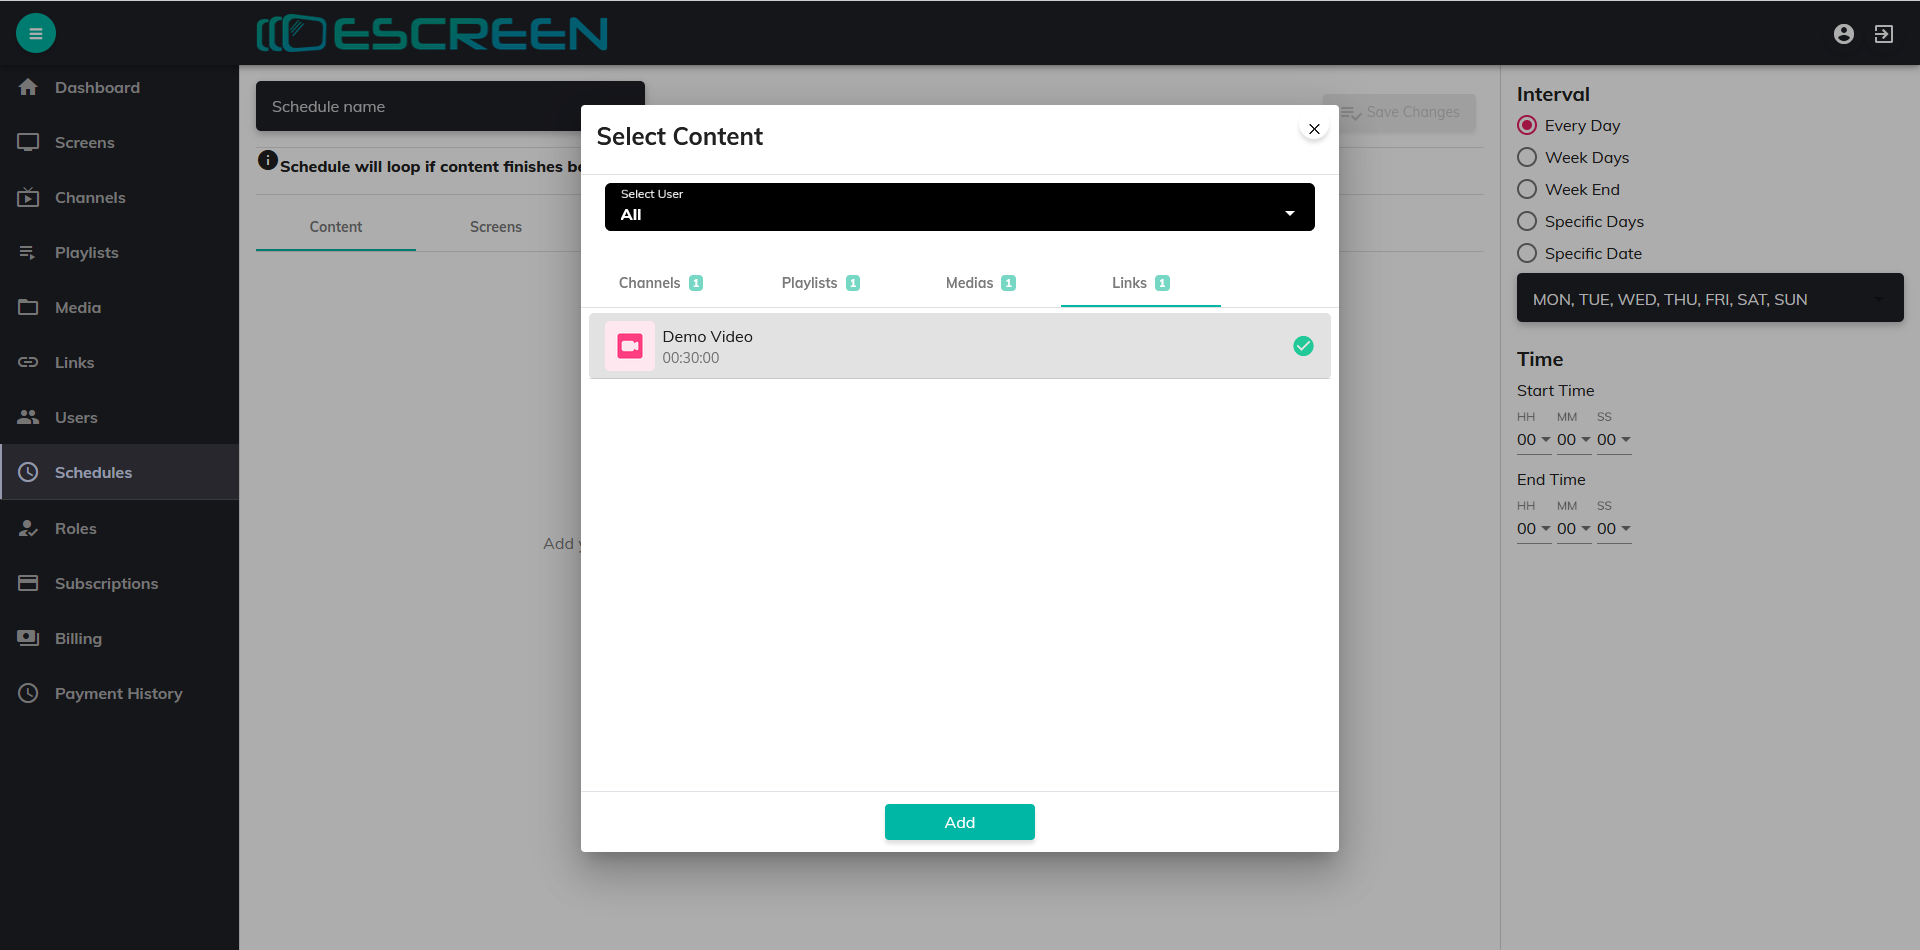
Step 3: Select Content
After clicking on Add Content, Select Content Box will appear.
From there content you want to schedule. Click on Add.
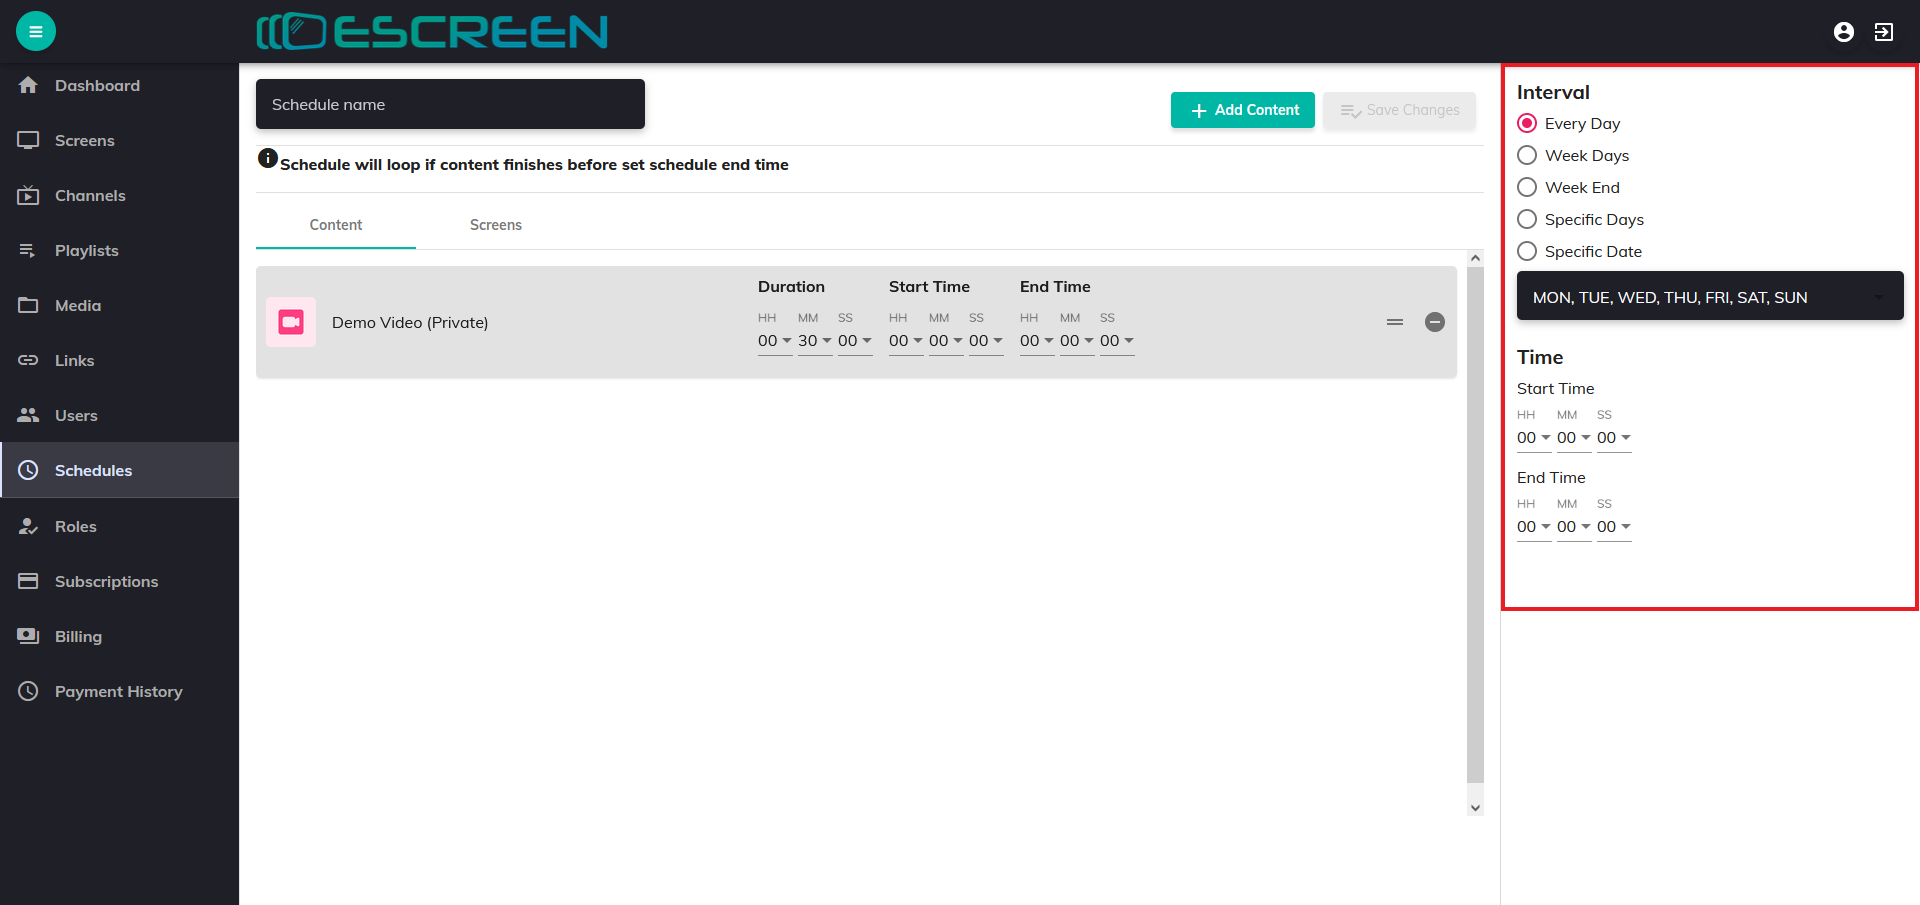
Step 4: Select Date, Day and Time
In Right-side of screen there is Interval Section, there you select Date, Day and Time to schedule your content
Select Start time and End time. (Note :- Schedule will loop if content finishes before time.)
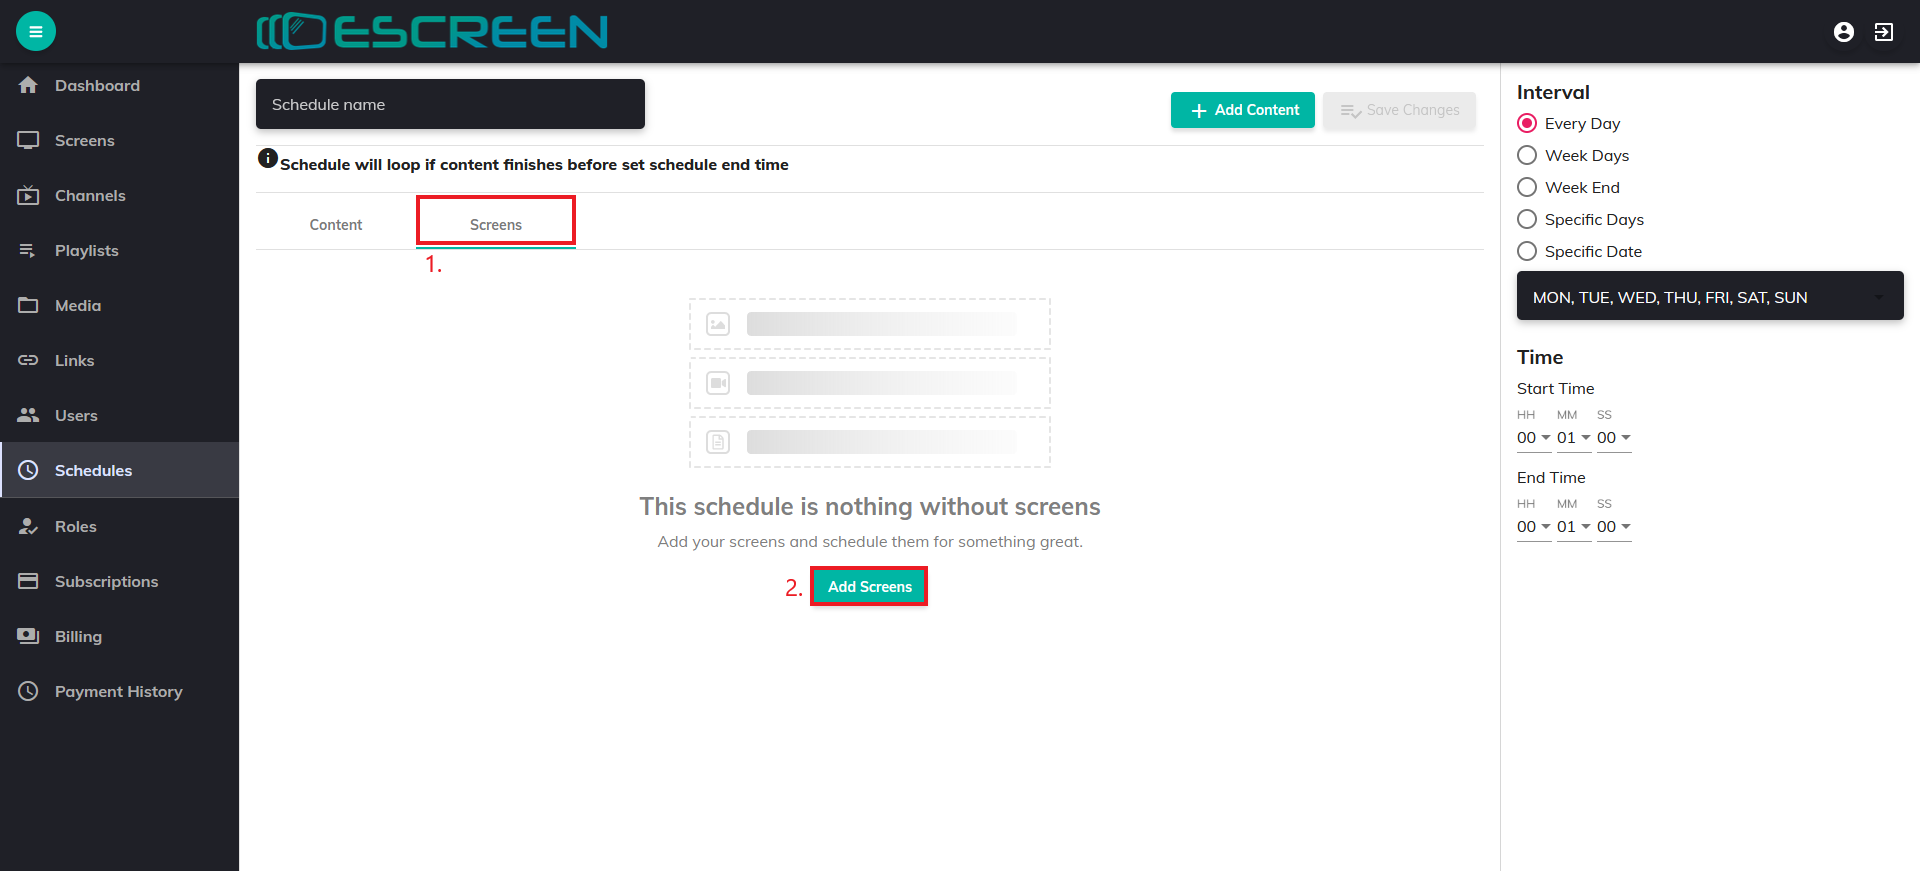
Step 5: Select Screen
Click on Screens, then click on Add Screens.
Step 6: Select Screens Box
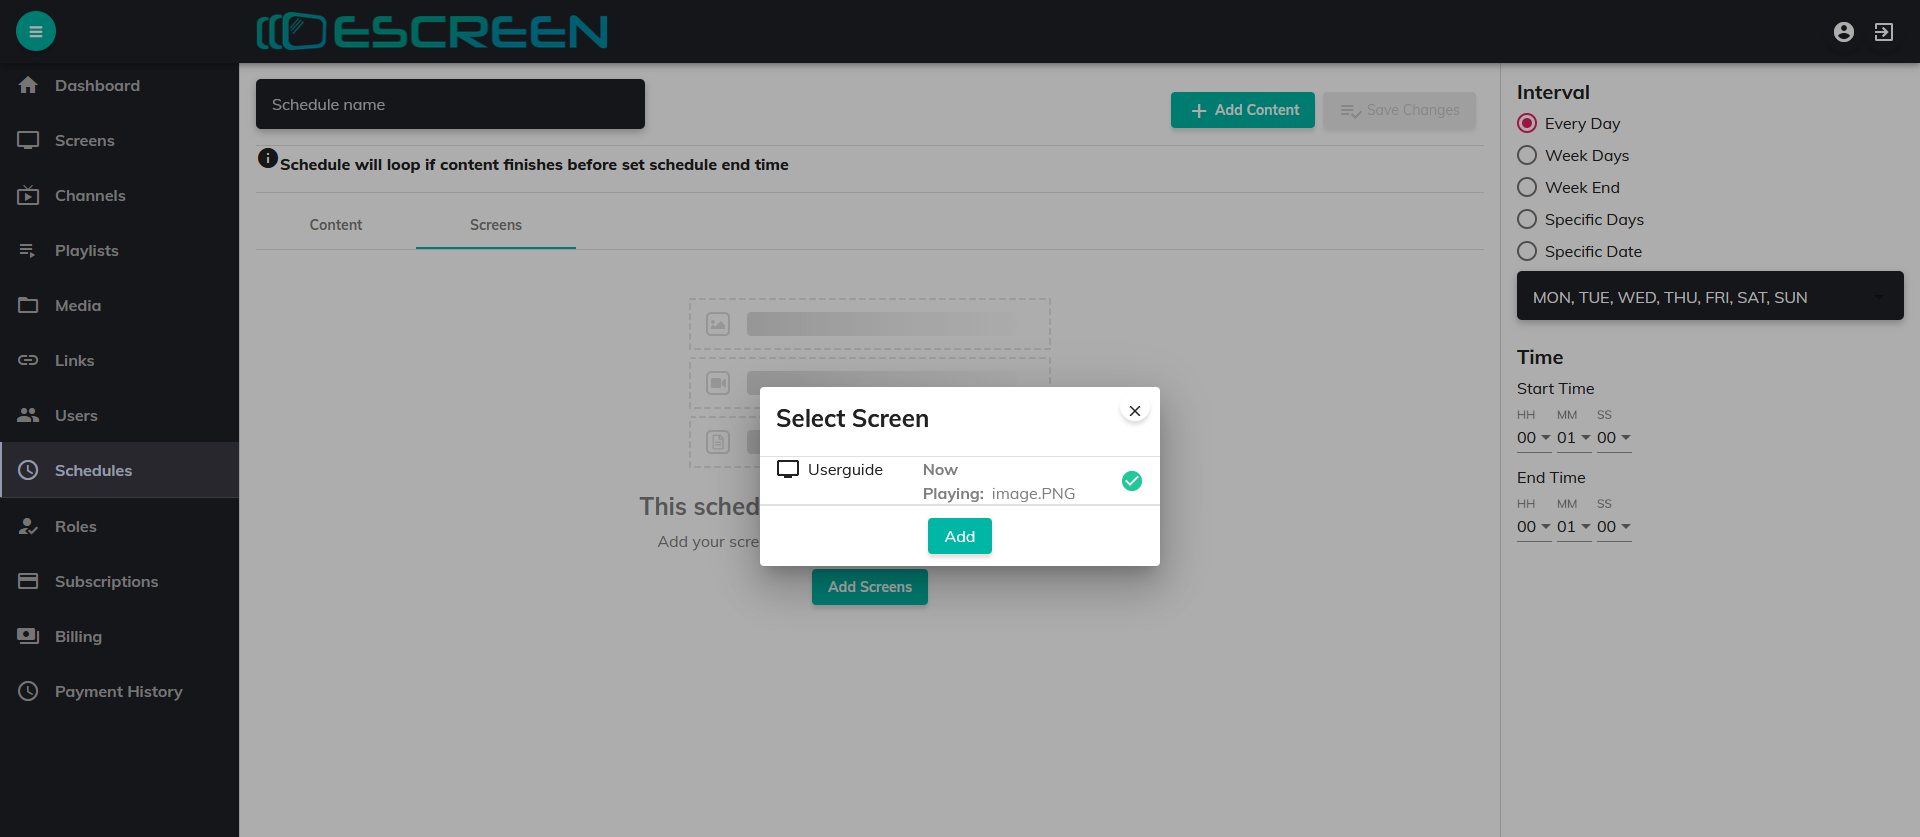
Select screen box will appear, choose the screen where you want to display content
Then Click on Add.
Step 7: Save Changes
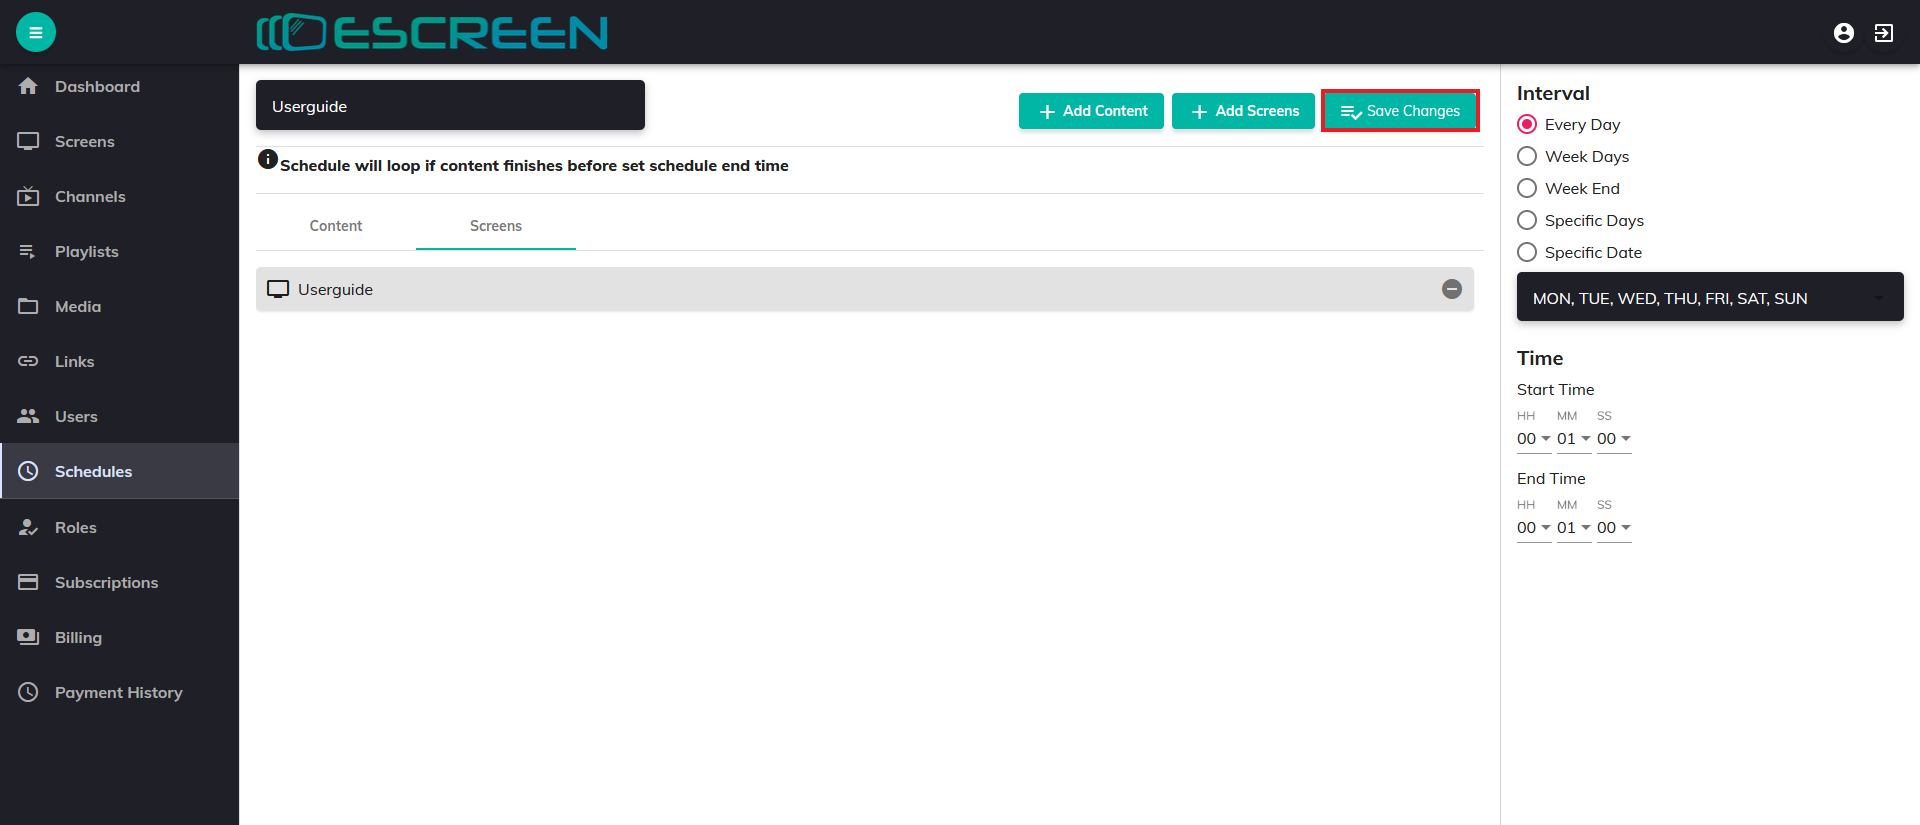
After you have added name, content and screen. Click on Save Changes.
(Note:- Make sure you have addedd schedule name, schedule content and schedule screen before you click on Save changes.)
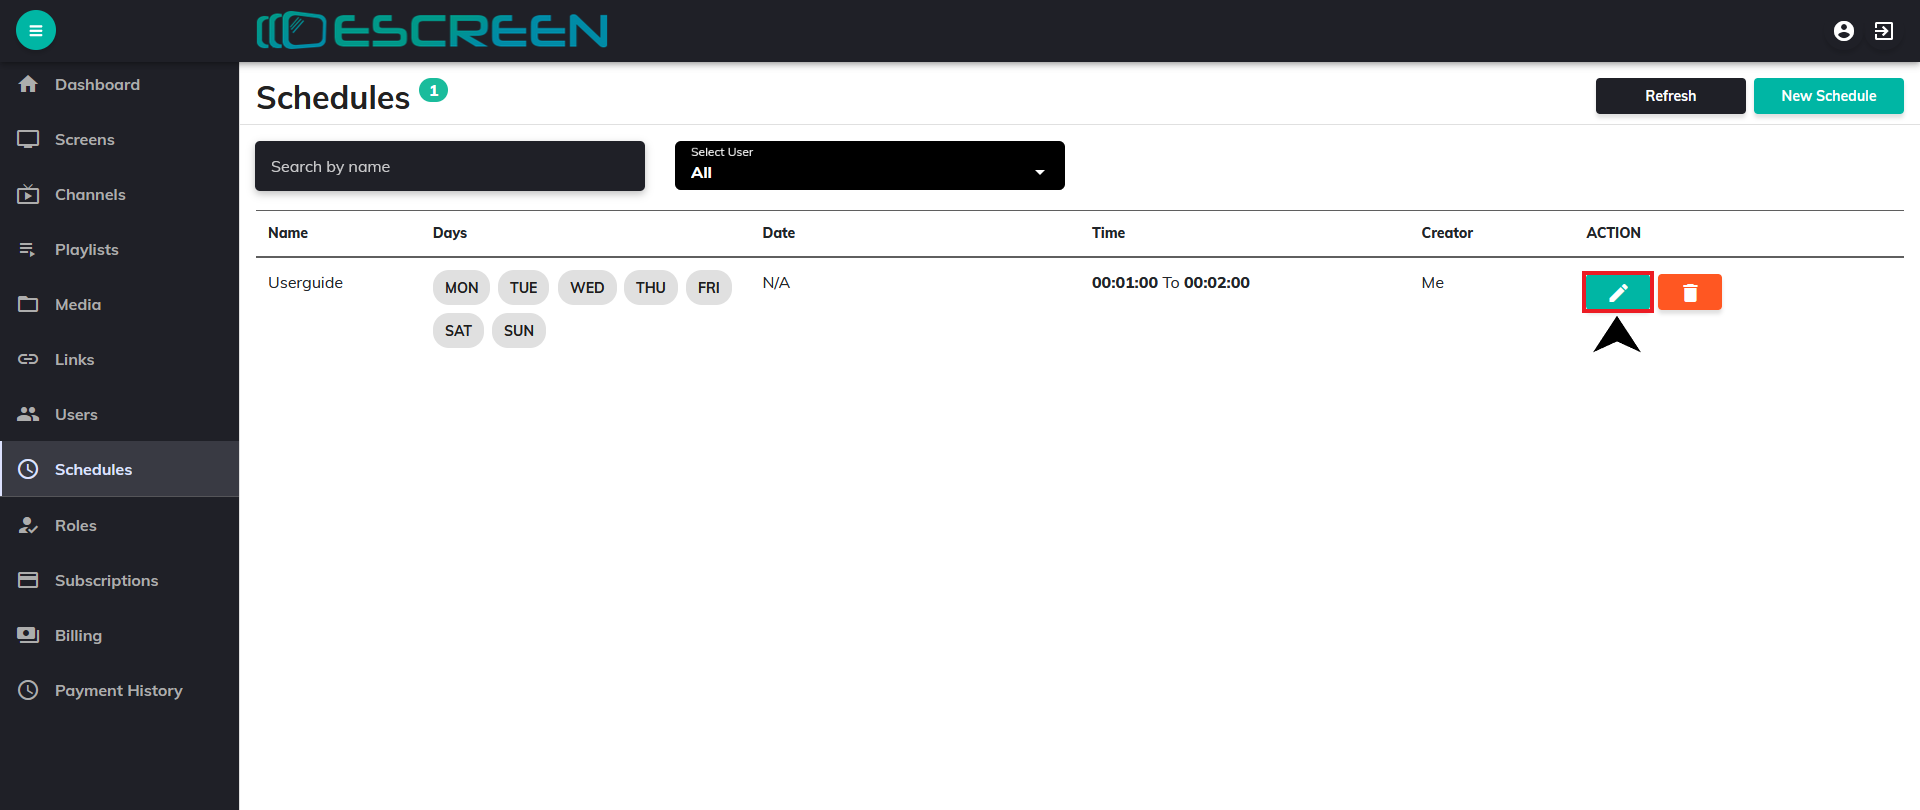
Step 8: Schedule Screen
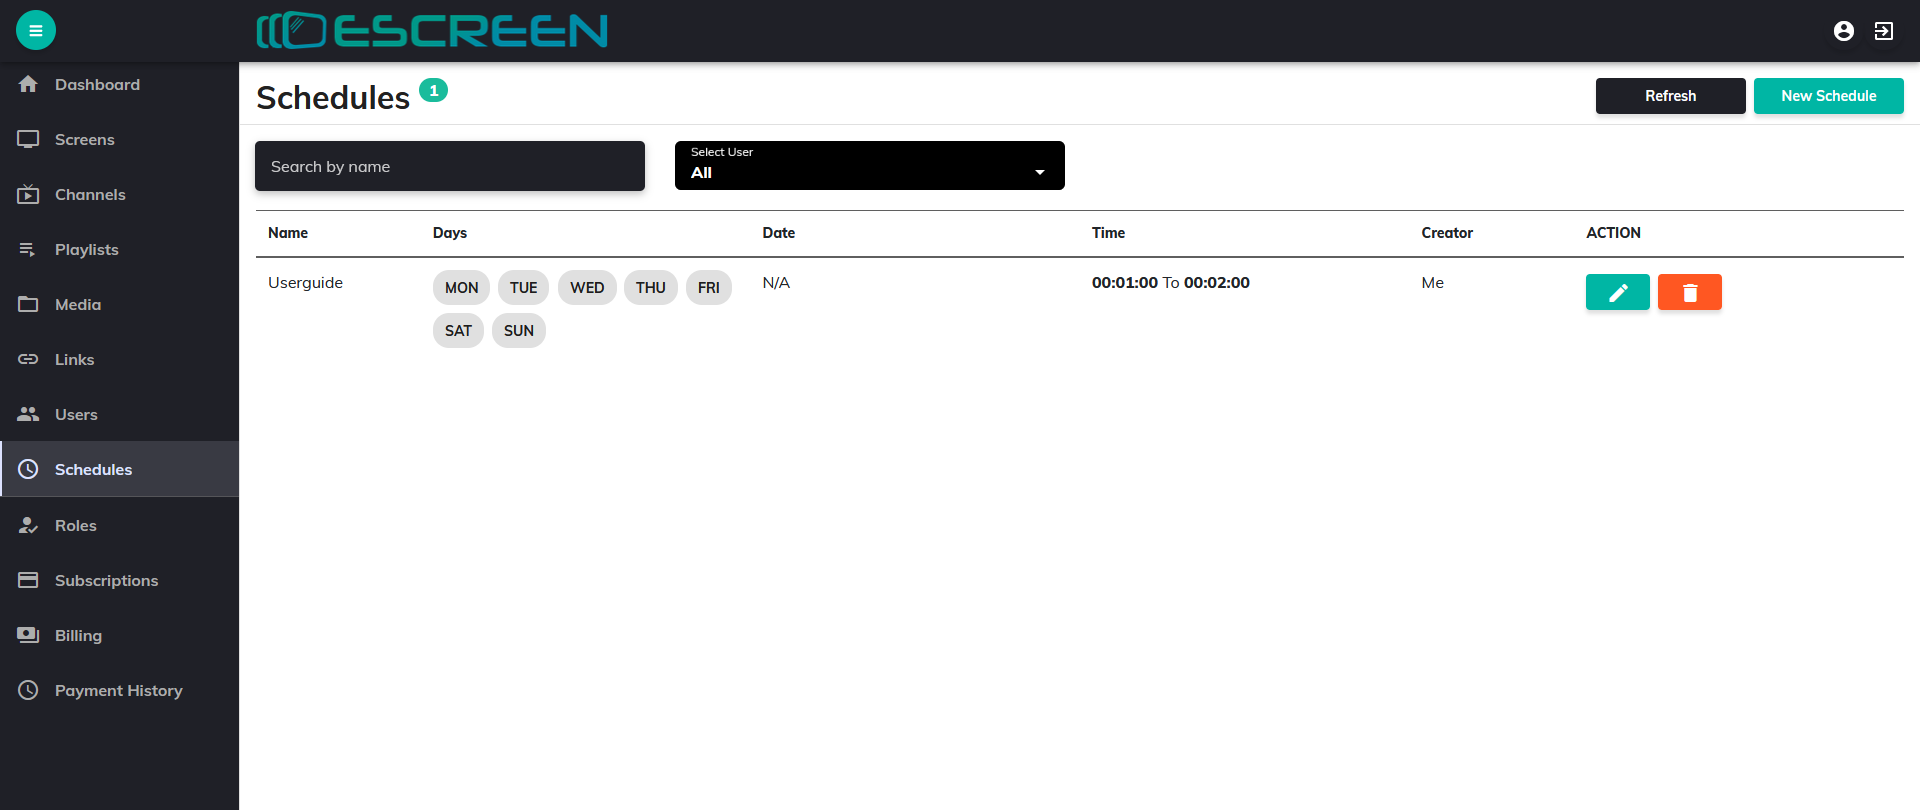
You will be re-directed to Schedule Screen.
Step 9: Edit Schedule
You can edit schedule by clicking on edit button.
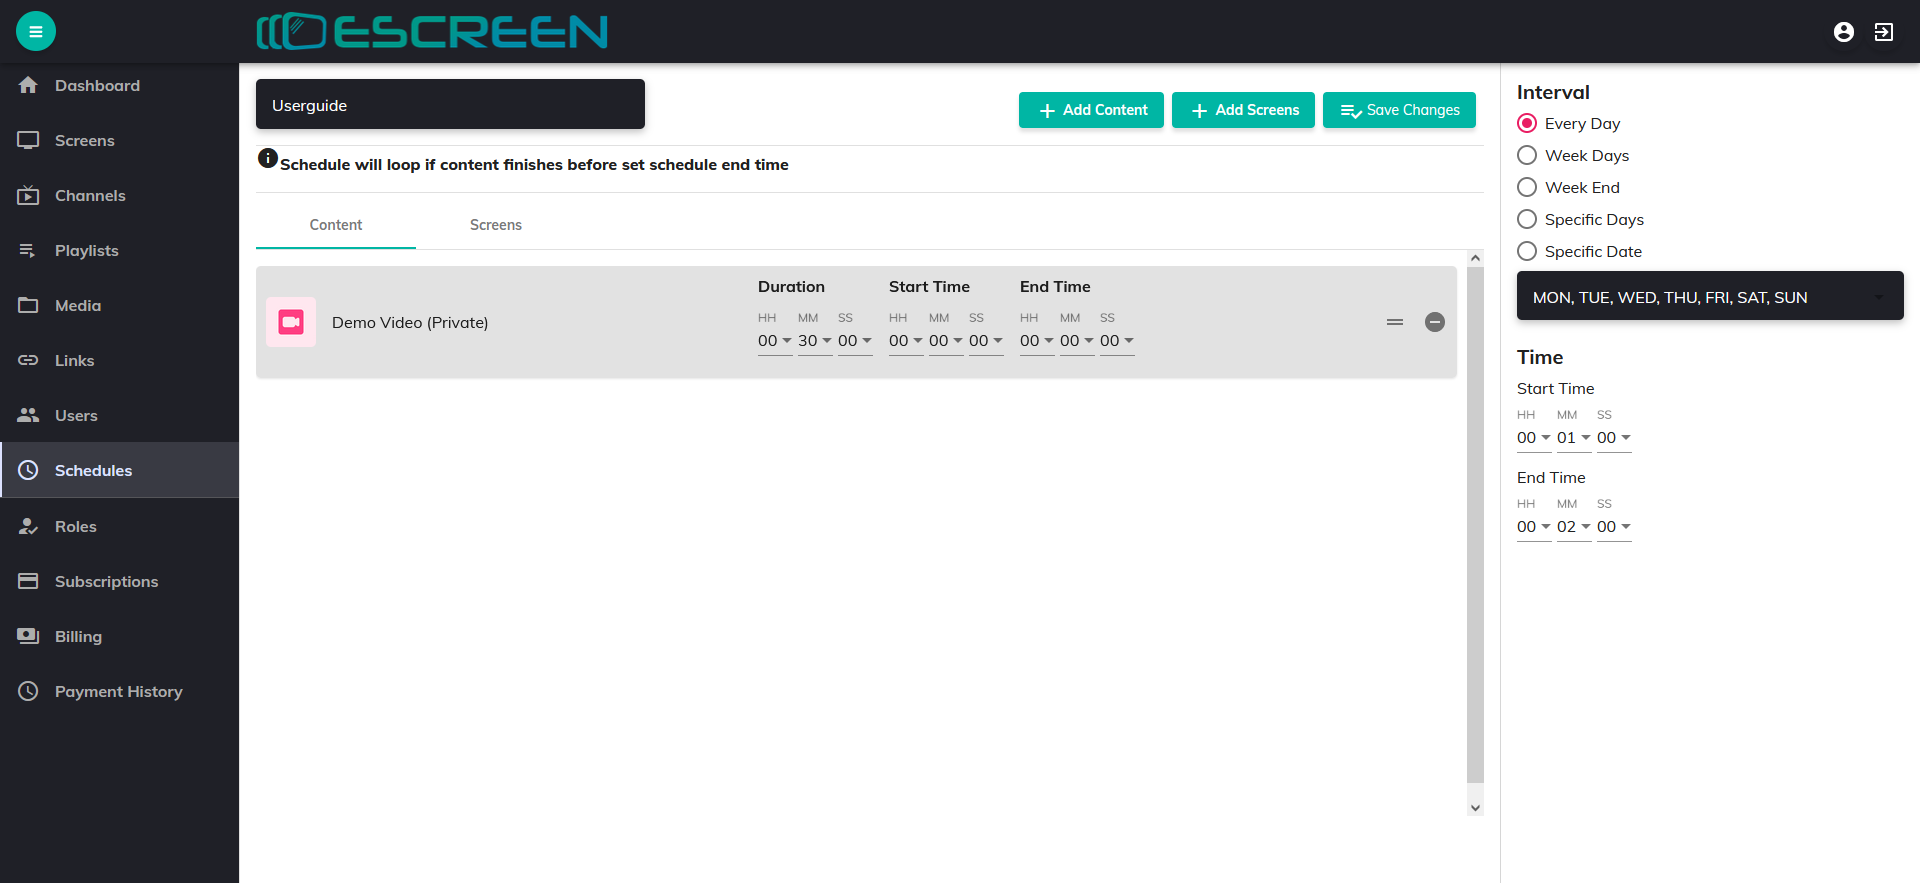
Step 10: Edit Screen
You will be re-directed to Edit Schedule Screen, there you can do changes regarding schedules. (Note:- Remember to click on Save Changes after you edited schedule.)
Step 11: Delete Schedule
If you want to delete your schedule, click on delete button.
Confirmation Action Box will appear click on YES to delete your schedule.

Now you have learnt to schedule your content on screen by selecting date, day and time. Also About edit schedule and delete schedule.

